Showing posts with label craft. Show all posts

New Year's Resolution Fail.

I am pretty sure waaaaaaaaaaay back in January I resolved to make 1 Pinterest project per month. Well, over half the year is gone now and I have little or nothing to show for my lofty goals. So I am perusing my "I think I can do that..." board and picking out 5 projects to finish before 2013 rolls around.

1. Photo Plaques

I picked this one because it looks fairly simple and well-within my skill set and I need to print out more recent photos of the hubs and I. Besides, I also want to re-do the bedroom, so this is a great and inexpensive way to have some new art for the walls!

2. T-Shirt scrap rug

I chose this one because I had high aspirations once upon a time to make a T-shirt blanket out of my old NIU t-shirts, so I cut them up. Fail. They are still in pieces in a bag in the closet. Perhaps if I cut them up some more I will actually use them! It's worth a shot...

3. Braided bracelets

If I can pull these off they would be lovely, inexpensive, yet meaningful Christmas presents.

4. A holiday wreath of some sort

There are ALOT of fun options for this one. It just depends on the season and amount of time I have to spare for it.

5. Some type of "word art"

Again, there are a lot of options out there for this one, it's just a matter of finding the right quote and medium to make it happen

A few honorable mentions if I can bang out the 5 above:
Ornaments as magnets for Christmas - another possible cool gift idea
Wire hanger words covered in yarn
Photo tiles/coasters/canvas
Upcyling frames and old cookie sheets
Date night jar (maybe for Valentine's day?)
A DIY cake stand 

Oh yes, and I want to make a quilt.

And I just started re-decorating my bedroom, including a giant dresser-painting project. 

Just color me crazy.

I can't wait to get started!!

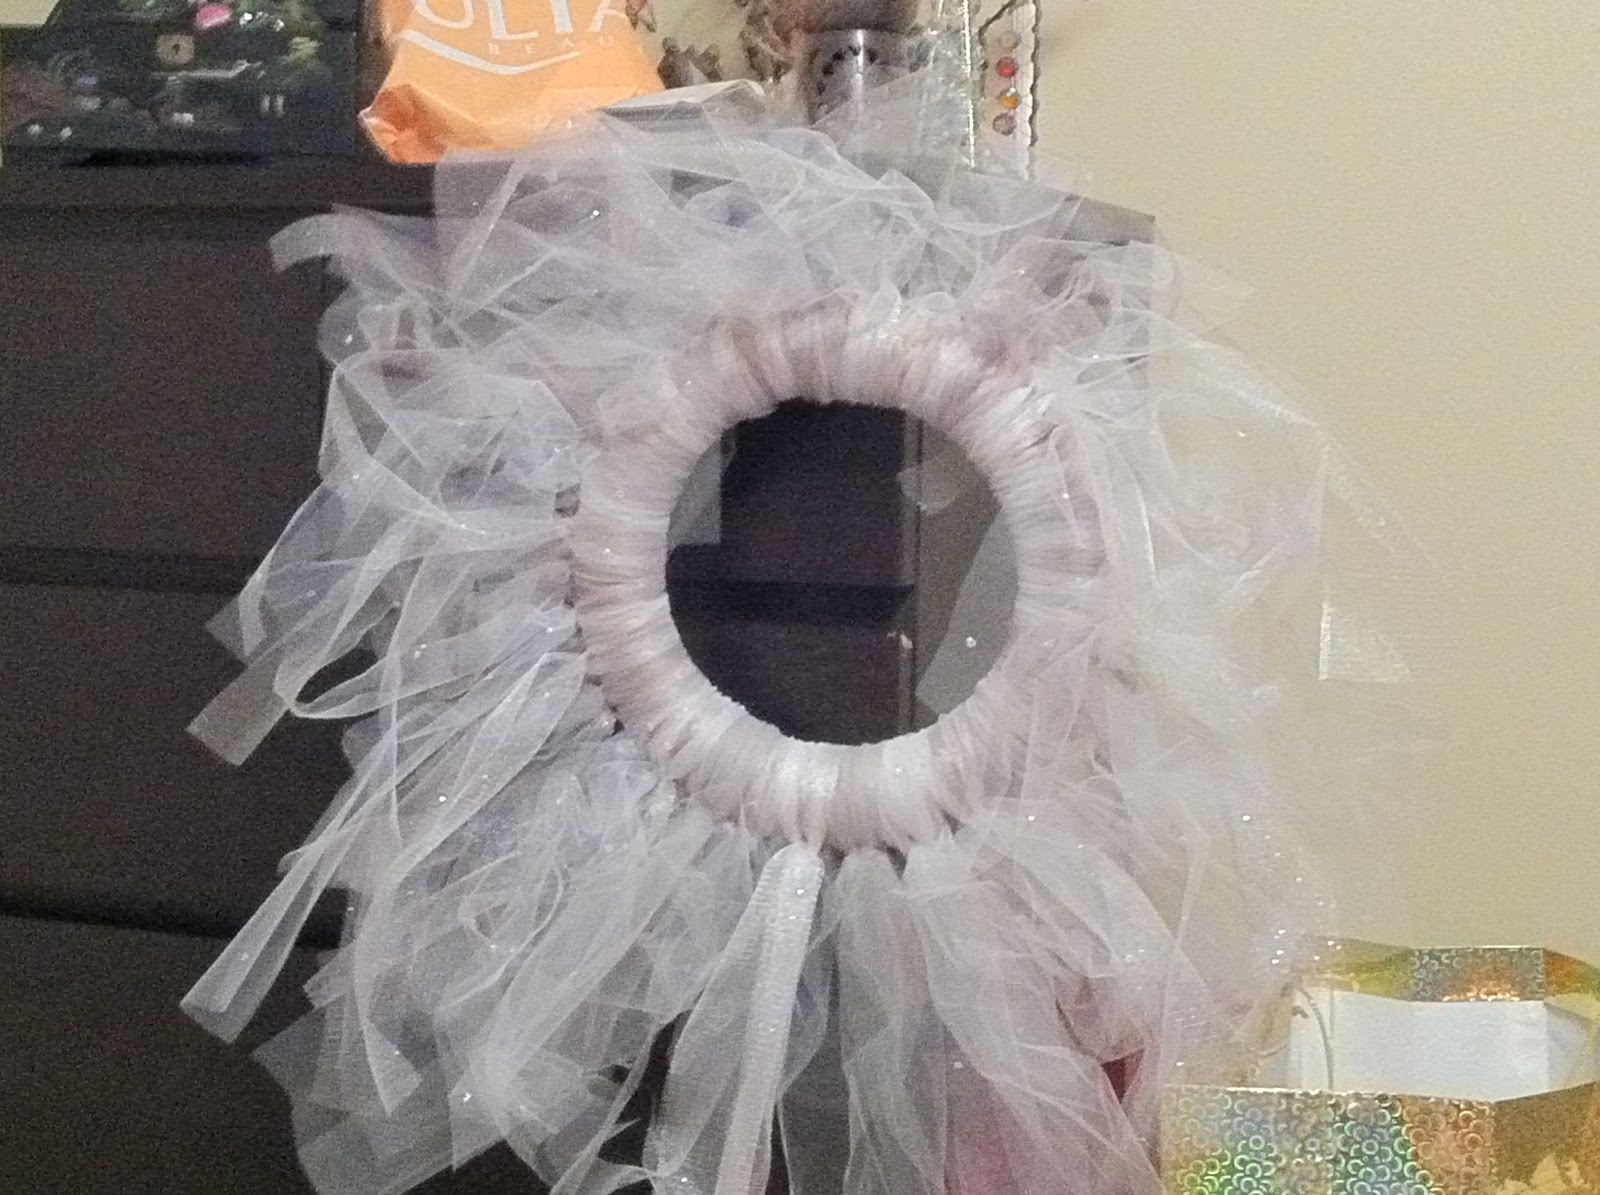
Pinterest Project #1 - Fluffy tulle wreath - complete!

I am halfway to one of my November goals! I have completed a pinterest project!!


I was inspired by this beauty here:

Unfortunately, there is no tutorial, just a link to the etsy shop, so I had to wing it on how to make it. Luckily, Mama Derry and I made tulle tutus a couple years ago, so I had a good idea on what to do.

Materials:
Twine/jute string
Tulle (in different shades of silver and white and GLITTER!)
foam floral wreath
Embellishments
push pins


I wrapped a foam wreath in jute/twine first. Then I started tying on tulle.
Here is a halfway photo: (I ran out of jute string!)


I just pinned on the flowers and the twine one is actually an ornament. That was a flea market find!

Here she is pre-flowers and in dire need of a hair cut:

Unfortunately, I had no idea how much tulle to buy, so of course, I overdid it. I have a TON of it left over, but good thing I am hand-making lots of Christmas decor this year! yay!

The finished product (who may still get another haircut):


Stay tuned for another project... or 2... or 3!!

Before and After: Ottoman

One of the many projects on my list was to cover this sexy blue jean ottoman:
Tell me how many of you want that sexy beast in your home! haha It was a $10 score from Savers. It is super light-weight and I really liked the shape and softness of it. It will be great as a seat for your bum or your feet. But really - blue jean? There was no way that blue jean was going to have a place in my living room. I had visions of a more sophisticated textile:

A rich, creamy suede. I am drooling just thinking about it. My only problem with this project was that I don't have any real experience with re-upholstery, so naturally, I did what any smart, capable, and crafty woman would do: I took it home to Nana. 
 

We literally just tossed the suede on top of the ottoman and started tucking and eventually stapling. Papa is very handy with a staple gun folks. I highly recommend using an electric staple-gun for these types of projects. I have done stuff with a manual one and it is just so much more efficient to have the power behind it.

We started by securing one side with a couple staples and then pulled it tight and stapled the side directly across. We did the long sides first because our ends were going to end up with some pleat-type things and we thought it would look better on the short sides.
Observe said pleats above.
I do need to throw it out there that I am no-where-near being a perfectionist. We made them all as even as possible without pulling out our hair. I think it does look pretty cool - even though it may not be perfect.

To finish off the bottom of the ottoman we cut a rectangle out of a bed-skirt that I had also gotten at Savers. This just gave it a cleaner finish.
Just for fun, I think you all should know I was wearing these shoes during this entire project. :)

And for the big reveal:
Ta-Da!!!!


You like??? I do! I will post some pics in the next week (or 2) of the whole living room, so you can see it in its new home and not on my grandparents' kitchen table :)


Kitchen Light Loathing

I HATE my kitchen light fixtures. HATE them. I thought they were all cute and modern when we moved in, but living with them on a day to day basis has revealed more flaws than appeal. They give off more heat than light. The bulbs are like little individual spot lights and there are areas of the kitchen that do not get adequate lighting. The bulbs are also a HUGE pain to change - Brandon and I have broken more than our fair share in the past year and I am a little bitter at a light fixture that requires more than one person to change a bulb. These are the current fixtures:

Not so bad at first glace. Just live with them for a year. So, I am starting to look for some practical light fixtures that I can replace these with. From what the men in my life tell me, it won't be difficult to do. We will just store those bad boys until we move out and we could be in this apartment for a pretty long time, so I might as well love my lights :)
Here are some inspiration photos. I am just looking at style right now - I will worry about finding some bargains once I have a clear idea of what I would like. Keep in mind too that my kitchen-style is pretty countryfied now. I need something that is going to give off a good amount of light - and have 2 places to put up fixtures. I was also thinking about supplementing with some push-on lights, mounted underneath the cabinets, to give a little more light to the cooking space.
OK- now pick your favorites!!
Option #1

Option #2

Option #3 - kinda similar to 1

Option #4 - kinda similar to 1 and 3

Option #5

Option #6

Option #7

*sigh* Ultimate-fantasy-someday light.
 Alrighty - tell me your thoughts kids!

Warren Cupboard White wash

After being more than irritated with my after-Christmas living room, I was inspired a couple weeks ago as I was walking through Home Goods. I LOVE shabby-chic distressed furniture. I coveted pretty much everything in the darn store, but left with just 3 small things that were on clearance and basically free (Thank you Chase rewards)... I will show you those at a later date. Ha!
Today is all about the Warren Cupboard. We call it that because our friend Warren gave it to us for a wedding gift, and Nana called it that once, and it stuck. :) Anyway, it was a very dark brown wood color, and worked great in our last living room. See:

But was not doing it for me in our new space.

See how it just blends in to the background? Not so cute.

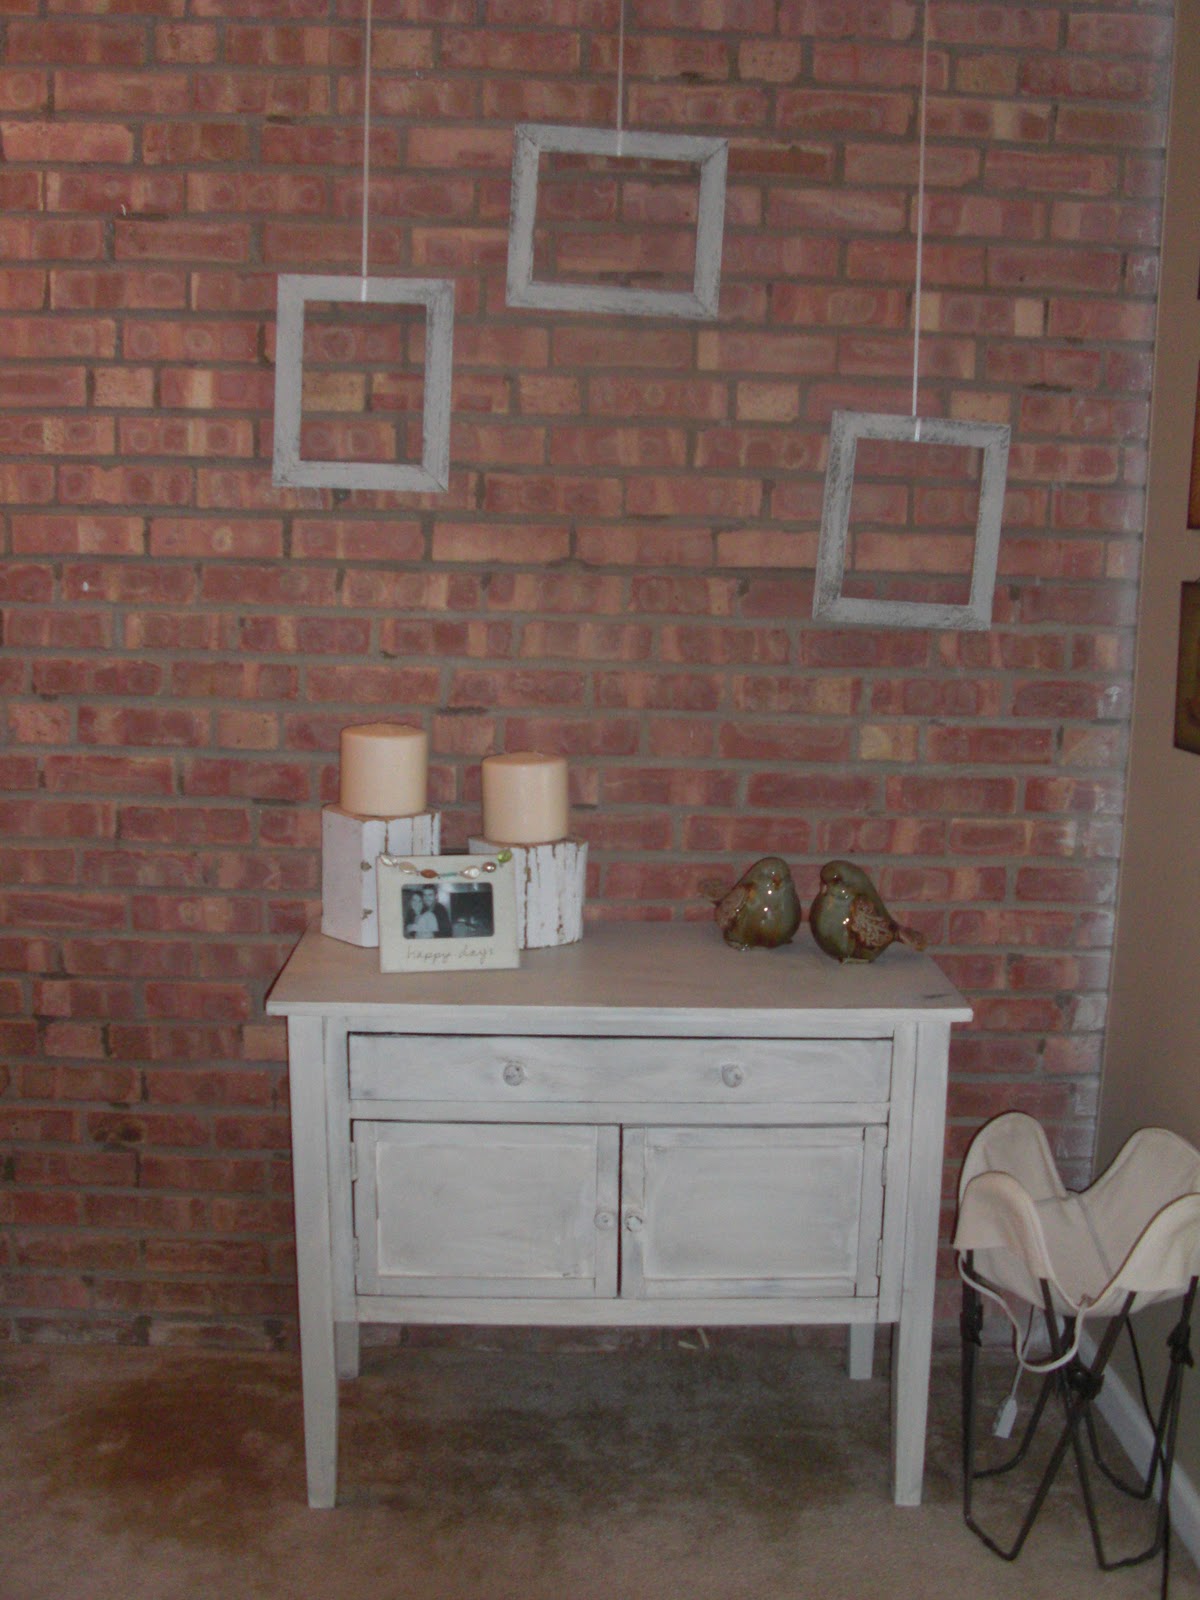
I decided, after my Home Goods adventure, that I was going to take the plunge and just paint the darn thing. I got a kit from Micheal's called "Distressed Ivory" by American Accents. Following Papa's instructions, I "roughed it up a bit" then wiped it down and went crazy. I am not really impressed with the paint I got, it was VERY watery. And I mixed people! I mixed! I even kept mixing randomly as I was painting and it FINALLY thickened up a bit, after I finished the first coat. I was kind of worried after coat 1. Here's what it looked like.


Coat 2 did better though- full coverage! Yippee! I let it dry overnight and then after a failed sanding attempt (to "rough it up" some more) I just slapped on the stain, and wiped off with a dry cloth. It took me all of 10 min to do the staining and can I just say, I LOVE IT. It coordinates so much better with the entire living room now! Yay!

I also gave those old barn-wood frames the same treatment and hung them on removable hooks, since I had liked that look so much with the wreathes at Christmastime. :)


My next white-wash project will be our TV stand, but it will have to wait until I can recruit some help getting the darn TV off of it! haha, but stay tuned for a mantle-revamp! :)

Bulletin Board Quickie

After my office re-arranging and organizing I did a super fast re-vamping of my bulletin board. This thing was previously a necklace holder and it had some craters in it and it's just not pretty or inspiring to look at plain cork.  I had some leftover material from my boxes for the bedroom project and pulled it out to use. I also used a stapler, fabric glue, and a round-cutter thingy (that is the technical term).
I stapled the fabric around the edges and trimmed off the excess using the cutter. I made sure the fabric was stretched pretty tight across the board. I wasn't too worried about the edges being neat (not too much of a perfectionist here)
Then, I used black ribbon to edge it. I stabled an end of the ribbon and used fabric glue to make it stick in the middle. And then- Voila!
Pretty cute huh? :)
My first craft at my newly organized desk! haha